Monday 7 May 2012

Sikuli - Presentation of Script Results

There are three methods for Sikuli Scripts to present results to the user: pop-up, print, and file io.

Pop-up

Pop-up alerts are the highest priority/highest visibility method of interacting with the user, but have the lowest data persistence. Typically, a pop-up is combined as a part of a try block or if statement. This presents the user with one or more lines of text, and halts the Sikuli script. The halting of the script allows users to inspect the current screen, modify graphical elements and mouse positions, and resume operation. Pop-ups can be used like a breakpoint within the script. The only downside is that there is no permanent record of the pop-up. Typically they need to be removed or commented out of a completed script.

def Alert():
    AlertL1 = "Sikuli Alert:"
    AlertL2 = "    - Displays 1+ lines of text"
    AlertL3 = "    - Halts the Sikuli script:"
    AlertL4 = "        - Allows inspection/modification of the screen/mouse"
    AlertL5 = "        - Allows user-controlled resumption of script"
    AlertL6 = "    - Used like a breakpoint or a try-catch statement"
    AlertL7 = "    - No permanent record of the alert."
    Str = AlertL1 + "\n" + AlertL2 + "\n" + AlertL3 + "\n" + AlertL4 + "\n" + AlertL5 + "\n" + AlertL6 + "\n" + AlertL7  
    popup( Str )
Alert()

Print

The python print command is used to print strings to stdout and does not interrupt the flow of the Sikuli script. When running Sikuli in the IDE, the stdout is captured and displayed in the Message window. The data is only moderately permanent and can be difficult to read. Because the window buffer is limited, for scripts with a large amount of print scripts there is the possibility of losing print data and the data is lost when a script is re-executed.

This is rectified by running the script from the command line and piping stdout to file. Unfortunately this file can be difficult to interpret because the stdout stream is also used for the internal Sikuli Logging messages (which uses the Jython Logging ilbrary). This means that the print data can become lost in a number of other messages.


def Print():
    print "Python Print:"
    print "    - Prints 1+ lines of text to stdio"
    print "    - In Sikuli IDE, text is displayed in the Message window."
    print "    - On the command line, text can be piped to file."
    print "    - Print command can be used without interrupting the flow of the Sikuli script."
    print "    - Data is lost the script is re-executed."
    print "    - stdio is used elsewhere, so print may be difficult to interpret"
Print()


File IO

Logging in Jython is normally accomplished through the Logging library. This library is in use by Sikuli, and its use has the same drawback as Print; an output file with multiple interleaved data streams that is difficult to read. A better alternative is to log to a separate user file using standard file IO. File IO allows the output strings to be encapsulated and if the logfile is opened in append mode, the data is also persistent across multiple executions of the Sikuli script. The file is by default located in the Sikuli base directory.

def Log():
    f = open("myLogfile.txt", 'a')
    f.write("Log to File:")
    f.write("    - Logs are persistent and encapsulated.")
    f.write("    - Logs do not interfere with Sikuli execution")
    f.write("    - Appended Logs 'a' allow for data persistence")
    f.close()

Log()

Building a Better Logger


Note that myLOG_CNT is a global variable. Globals must be defined as part of the Settings class and cannot overload an of the exsisting variable names. This logger includes a timestamp and message number to each entry. The file can also be located anywhere on the user's system.

import time

def LogMessage( FileName, msg ):
    """Though Python has logging capability, Sikuli already uses this to log its own stream of information. This 
       information includes mouse movements and keyboard entries and is exhaustive.  Using file IO allows the output 
       strings to be encapsulated and if the logfile is opened in append mode, the data is also persistent across 
       multiple executions of the Sikuli script.            
    """ 
    Settings.myLOG_CNT += 1
    dts = time.strftime('%Y-%m-%d %H:%M:%S')
    f = open(FileName, 'a')
    f.write('%s: msg# %d: %s\n' % (dts, Settings.myLOG_CNT, msg))
    f.close()


Further Reading:
05-07-2012 Sikuli X-1.0rc3 (r905)
Thursday 5 April 2012

Windows Themes - Determining the Windows Version

In order to make generic libraries, it is sometimes necessary to make decisions based on the current OS and Version under test. This is accomplished through the global Environment (Env) class. In the example below, the script loads one of two sets of Sikuli images depending on the OS and Version under test. The ..\WindowsXP\ and ..\Windows7\\ directories would contain Sikuli image (.PNG) files that have the same name, but whose image contents differ with the Windows Theme used on each OS.

"""Select a different set of images to use in the script depending on the OS/Version."""

if (Env.getOS() == OS.WINDOWS):
    # OS Version returns [ Major, ".", Minor ]
    OSVersionMajor = Env.getOSVersion()[0] 
    OSVersionMinor = Env.getOSVersion()[2] 
    if OSVersionMajor == "5":
        myImagePath = "c:\\Documents and Settings\\admin\\My Documents\\Sikuli\\images\\WindowsXP\\"
    elif OSVersionMajor == "6":
        myImagePath = "c:\\Documents and Settings\\admin\\My Documents\\Sikuli\\images\\Windows7\\"
    else:
        popup("Unsupported version of Windows. Exiting")  
        exit()    
    addImagePath(myImagePath)

Further Reading:
04-05-2012
Sikuli X-1.0rc3 (r905)

Monday 19 March 2012

Sikuli Regions

It is worth spending some time looking at how Sikuli Regions work. Unit testing in only the simplest of cases involves finding an image singleton on the screen. Unit Testing often involves selecting many similar objects and cycling through various combinations. Understanding Regions allows the script designer to focus the Sikuli scope to a subsection of the display, including or excluding graphical objects at will. The PNG image below is based on the Sikuli Region documentation. It contains a bit more information, but more importatntly is used with the Sikuli script below to provide an interactive way of exploring the Region methods.

Diagram of Extending a Sikuli Region


The white area is Reference Region. Above, Below, Left and Right are shown in different colours and DO NOT contain the reference region. Nearby is the only function that increases the size of the Reference Region.  The resulting regions from the PNG file that are created using the extension functions are shown below.   

The order of operation of the extension functions is very important as can be seen in the example below. nearby().above() increases all the Reference Region's edges by the default 50 pixels, then extends from this new box to the top of the screen.  above().nearby() selects the area to the top of the Reference region to the top of the screen, then increases this area by 50 pixels which re-includes some of the Reference Region.


It is possible to include the Reference Region and a new region. A region is set through x,y,width and height parameters. In the example below, the .above() region is combined with the Reference Region.


ReferenceRegion = find("PriimaryRegion.PNG")
#Start at the top of the screen
ReferenceRegion .setY( 0 )
#The height is now the combination of the ReferenceRegion and the height above
ReferenceRegion.setH(ReferenceRegion.H + ReferenceRegion.above().H)
#The X and W dimensions are unchanged 

The Sikuli script below uses Greenshot to copy and paste different areas to help visualize the different Sikuli areas.  Copy and paste into a sikuli project and add the two images that follow the script.


"""Demonstrates sikuli regions.  Copies different regions of a PNG file to Greenshot's clipboard.
   CaptureRegion and CloseCapture are really important general purpose debugging tools.  Keep these close at hand.
   
   Requires GreenShot to create the screen captures.  http://sourceforge.net/projects/greenshot/
   Open Greenshot and Firefox on the same screen.  If Greenshot is on a different screen, the close will not work
   correctly.  Do not change applications between popup windows or Greenshot may not close (another program may close
   instead)
   """

#openApp("C:\\Program Files\\Mozilla Firefox\\firefox.exe file:///M:\\SikuliExamples\Regions.sikuli\\sikuliRegions.PNG")
openApp("C:\\Program Files\\Mozilla Firefox\\firefox.exe https://blogger.googleusercontent.com/img/b/R29vZ2xl/AVvXsEg60kV7js7ZBFDQMhNkr_GduFTzOj-141agPqTAVlexHol3n0ljrwsaK8VjyPy67oprTBdnctcWPhALosvewTOibxf46ioq4kUXVOsMRevBClMbr2th5VHxflkz4vCO1M3kpCNkBffZsaWt/s1600/sikuliRegions.PNG")

#-------------------------------------------------------------------------------------------------------------------
def CaptureRegion( R ):
    """Capture the Region using Greenshot.  If the processor speed is too slow the dragDrop can occur before the
       capture is complete.  In such an event, extend the first wait state.  Greenshot must be launched before
       exiting the function (otherwise there may be a race condition).  Extend the second wait state if Greenshot
       does not seem to launch at the correct time in your script
       Keyword arguments:
           R   Region to capture"""
    # Capture the entire screen with Greenshot using the Print Screen button.    
    type(Key.PRINTSCREEN)
    wait(2)
    # Highlight the area of interest.  The drop will launch Greenshot
    dragDrop(R.getBottomLeft(),R.getTopRight() )
    wait(1)

#-------------------------------------------------------------------------------------------------------------------
def CloseCapture():
    """ Close Greenshot disposing of the image.  Greenshot must be the application in focus, if not a different 
       Windows app will receive the close command.  The App("Greenshot").focus() command does not work."""
    switchApp("Greenshot image editor - sikuliRegions.PNG (PNG Image, ") 
    wait(1)
    type('f', KeyModifier.ALT)
    type(Key.UP)
    type(Key.ENTER)
    # If the screenshot contains the mouse, Greenshot will prompt the user.  Dismiss the save.
    wait(1) 
    if exists( Pattern("Dialog_GreenshotSave.png").targetOffset(-2,36),1):
        type('N')


#===================================================================================================================
PrimaryRegion = find("PriimaryRegion.PNG")

CaptureRegion(PrimaryRegion)
popup("This is the PrimaryRegion")
CloseCapture()

CaptureRegion( PrimaryRegion.above() )
popup(".above()\nDoes not include PrimaryRegion")
CloseCapture()
CaptureRegion( PrimaryRegion.below() )
popup(".below()\n Extends to the bottom of the Screen")
CloseCapture()
CaptureRegion( PrimaryRegion.left() )
popup(".left()")
CloseCapture()
CaptureRegion( PrimaryRegion.right() )
popup(".right()\nBy default does not extend to the second screen.")
CloseCapture()

CaptureRegion( PrimaryRegion.above().right() )
popup("above().right()\nDoes not include either PrimaryRegion.above() or PrimaryRegion.right()")
CloseCapture()
CaptureRegion( PrimaryRegion.below().right() )
popup("below().right()")
CloseCapture()
CaptureRegion( PrimaryRegion.above().left() )
popup("above().left()")
CloseCapture()
CaptureRegion( PrimaryRegion.below().left() )
popup("below().left()")
CloseCapture()

CaptureRegion(PrimaryRegion.nearby())
popup(".nearby()\nNearby increases each region edge by default 50 pixels")
CloseCapture()
CaptureRegion(PrimaryRegion.nearby(5))
popup(".nearby(5)\n The default pixel size can be overridden")
CloseCapture()
CaptureRegion(PrimaryRegion.nearby(100))
popup(".nearby(100)");
CloseCapture()


CaptureRegion(PrimaryRegion.nearby().above())
popup(".nearby().above()\nOrder of operation is important.")
CloseCapture()
CaptureRegion(PrimaryRegion.above().nearby())
popup("above().nearby()")
CloseCapture()

# Create a list of .PNG files that are a part of the project that are not explicitly defined in the Sikuli script.
# Without this tuple, the Sikuli IDE will automatically delete the images.
#https://answers.launchpad.net/sikuli/+question/151185
myImages = ("sikuliRegions.PNG","sikuliRegionsWithLogos.PNG");

Images required to run the script:


Below is a video of the running script:


 Further Reading:
03-19-2012
Sikuli X-1.0rc3 (r905)

Monday 12 March 2012

PyDoc - Inline Documentation

Now that the project contains libraries, providing some high-level documentation will become increasingly important. Python contains an inline documentation tool called PyDoc allowing code and comments to exist side-by-side. The objective is to change the comment blocks (#) to Python DocStrings which can be parsed by PyDoc.
  • DocStrings are Strings wrapped in double quotes

  • ""This is a single line docString"" 

  • Often docStrings are wrapped in triple quotes to allow the text to span more than one line in the file.

  • """This is a single line docString"""
    """This is a multi
       line
       docString""" 

  • Add comments to modules, classes, and functions.
    • Add a comment for the module at the start of the file
    • Add comments for each class after the class definition
    • Add comments for each function after the function definition

..\\HelloWorldLib.py
"""Module Hello World"""
def helloWorld(Title, Body):
    """Create a non-modal popup window
           Title  Title of the popup 
           Body   Body message of the popup"""
def helloWorld(Title, Body):
    popup( Body, Title) 

Extracting the library documentation requires another Sikuli project. It could be combined with the HelloWorld mainline, but it is not typical that library documentation would be created in the same project that uses the library (the documentation should pre-exist).
  • Create a new Project ..\\..\\ParseInlineDocumentation.sikuli
  • Add the base directory to the sys.path. Subdirectories are recursively added.
  • import pydoc

  • import pydoc 

  • Extract the DocStrings for HelloWorldLib.py

  • pydoc.writedoc("HelloWorldLib") 

  • This creates the output documentation file "HelloWorldLib.html" in the Sikuli executable directory. Open
  • Open the documentation. A command to do this automatically after generating the files is included in the parse script.
..\\ParseInlineDocumentation.sikuli\\ParseInlineDocumentation.py
myScriptPath = "...\\ library path \\"
if not myScriptPath in sys.path: sys.path.append(myScriptPath)
import pydoc


pydoc.writedoc("HelloWorldLib")
# Note that spaces in the URL must be denoted by their escape sequence
openApp("C:\\Program Files\\Mozilla Firefox\\firefox.exe file:///c:\Program%20Files\Sikuli%20X\HelloWorldLib.html")

The documentation will look like this: Hello World Inline Documentation

Further Reading:
Special thanks to RaiMan for his assistance with getting this working. Sikuli Help Question re PyDoc
03-12-2012
Sikuli X-1.0rc3 (r905)

Thursday 8 March 2012

Moving a function into a module

Encapsulation is very important for Sikuli scripts. Because progress can be made very quickly with the tool, and because the process does not necessarily resemble formal programming it is really easy to forget basic software design principles.

Sikuli Library Script

  1. Move the function into a new file
  2. Make the encapsulated import script Sikuli aware.
  3. from sikuli import *

..\\mLib.sikuli\\HelloWorldLib.py
# Import Script - Filename: .\HelloWorldLib.sikuli
from sikuli import *

# Instantiate a Hello World Popup Window
# The parameters are comma delimited
def helloWorld(Title, Body):
    popup( Body, Title)

Sikuli Main Script
  1. Add the import script path to the Jython path
  2. myScriptPath = "c:\\..\\<library>\\"
    if not myScriptPath in sys.path: sys.path.append(myScriptPath)
  3. import the library
  4. import <library>
  5. Reload the library to incorporate changes
  6. reload(<library>)
  7. Add the library image path to the Sikuli image path
  8. myImagePath = "c:\\..\\<image library>\\"
    addImagePath(myImagePath)
  9. Make the call to the library
  10. library.function()

..\\HelloWorld.sikuli\\HelloWorld.py
# Jython will recursively search this path for .py files
# Backslash must be escaped. \\ instead of \
myScriptPath = "c:\\Documents and Settings\\admin\\My Documents\\Sikuli\\mLib.sikuli"

# Since the Sikuli IDE does not reload the modules while running a script each
# time, Import and reload the library to make sure new changes are incorporated
import HelloWorldLib
reload(HelloWorldLib)

# Add search path for images
myDefaultImagePath = "c:\\Documents and Settings\\admin\\My Documents\\Sikuli\\images\\"
myImagePath = "c:\\Documents and Settings\\admin\\My Documents\\Sikuli\\mLib.sikuli\\images"
addImagePath(myDefaultImagePath)
addImagePath(myImagePath)


# The parameter order is Title, Body
HelloWorldLib.helloWorld("Hello", "World")

As always, check all the changes into source control.


Further Reading:
Importing Sikuli Scripts
Image Search Path


03-08-2012
Sikuli X-1.0rc3 (r905)

Monday 5 March 2012

Python - Pass variables to a function

Functions can also have parameters.

# Comment: The parameters are comma delimited
def helloWorld(Title, Body):
    popup( Body, Title)

# The parameter order is Title, Body
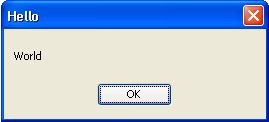
helloWorld("Hello", "World")


The result is the same as in the previous example.


Further Reading:
Python Function Tutorial


03-05-2012
Sikuli X-1.0rc3 (r905)

Sikuli is Python - Creating a Function.

All semantics for Jython (python for java) apply to Sikuli. Change the Hello World popup to run as a "private" function.


# Comment: This is the function
def helloWorld():
    popup( "World", "Hello")

# This is a call to the function
helloWorld()


The result is the same as in the previous example.


Further Reading:
Python Function Tutorial


03-05-2012
Sikuli X-1.0rc3 (r905)